

- There are several methods for transferring files between your iPhone and Mac.
- AirDrop enables the wireless transmission of files between an iPhone and a Mac without the need for an internet connection.
- Apple also offers iCloud Drive as an alternative, but it must be configured on both devices first.
When you’re in Apple‘s ecosystem of products, it normally works fairly well. Using iMessage on your iPhone to resume where you left off on your Mac is extremely cool and can be quite beneficial. You might be wondering how this experience transfers to file sharing between an iPhone and a Mac. Here are five ideas to get you started.
AirDrop
AirDrop is a quick and easy way to transmit files between an iPhone and a Mac. You can exchange files with a few clicks or taps once you’ve activated AirDrop on your Apple devices.
Moving from an iPhone to a Mac:
- Open the file you want to share and press the share icon, which looks like a square with an arrow pointing up.
- If you see a Mac icon, tap it, otherwise tap the AirDrop symbol and choose your Mac from the ensuing menu. The file should now be transferred.
From the Mac to the iPhone:
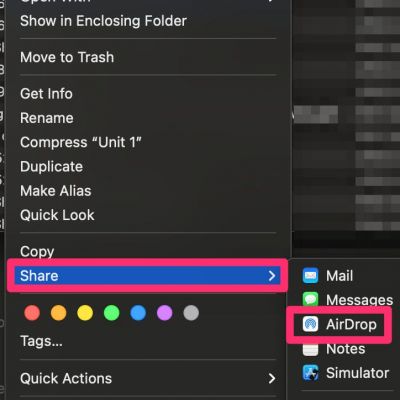
- Right-click the document you want to share and select Share.
- In the resulting menu, hover over Share and select AirDrop.
- To deliver the file, select the recipient iPhone from the list and click Done.
iCloud Drive
You must first set up iCloud Drive before you can utilize it. Please read our instructions for configuring iCloud Drive on an iPhone or Mac.
Moving from an iPhone to a Mac:
- Open the file you want to share and press the share icon, which looks like a square with an arrow pointing up.
- Scroll down and press the Save to Files button.
- Select iCloud Drive from the new menu that displays
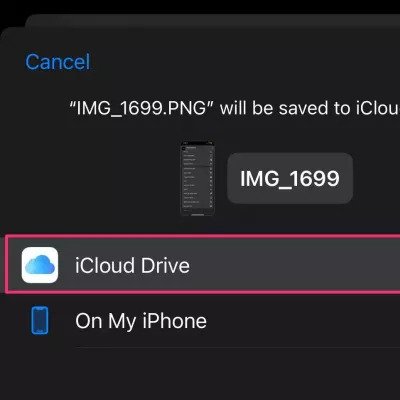
- Select Save.
- On your Mac, launch Finder and navigate to iCloud Drive. Your file will be included.
From a Mac to an iPhone
- In Finder, copy the file you want to share into the iCloud Drive folder.
- Open the Files app on your iPhone and choose iCloud Drive from the list of possible locations.
- Tap on the three horizontal dots in the upper right corner of the screen, then on Select.
- Tap on the file to be transferred.
- Tap the Share option and then choose how you want to transfer the file. This may be Save Image if the file is an image, or another choice if it is a different sort of file.
Google Drive
Google Drive is one of many cloud storage systems that can be used to move files between your iPhone and Mac, and it offers 15GB of free storage to all Google accounts. Refer to our instructions on how to upload files to Google Drive from your computer and mobile device once you’ve gotten started with Google Drive. After you’ve submitted the files, you may access – and download – them on your Mac or iPhone.
Email is a tried-and-true method for transmitting files across machines.
From the iPhone to the Mac:
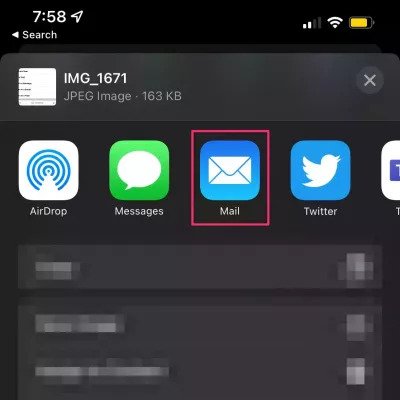
- Open the file you want to share and press the share icon, which looks like a square with an arrow pointing up.
- Open either the default iOS email app (Mail) or another email app and fill out the details to send it to yourself.
- Open your email application on your Mac and examine the email message you just sent to yourself with the file(s) attached. You can get the attached photos by clicking here.
From the Mac to the iPhone:
- Launch your email client, compose a new email, attach the file, and send it to yourself.
- Open your favorite email program on your iPhone and view that email message. You now have the ability to view and save the attachments.
Capturing Images
Image Capture is an application included by Apple in macOS that allows you to download images from devices such as cameras or iPhones to your Mac. Image Capture requires your iPhone to be awake and unlocked to function.
- Use a USB cord to connect the iPhone to your Mac.
A quick tip: When you plug in your iPhone, it may encourage you to trust your Mac. Choose Trust and input your iPhone’s lock screen password (if you have one), and your iPhone will appear in the Finder on your Mac.2
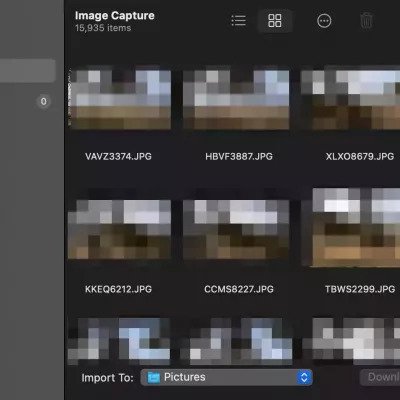
- On your Mac, select your iPhone from the left-hand side of the Image Capture application.
- You can now choose where to import your images to on your Mac – or any other connected device. You can import all photos or choose specific ones.
Get To Know More About: How to use iOS 15.4 to unlock your iPhone’s Face ID while wearing a mask